MORE ABOUT CARGO AND CREATES.IO, ch 14
we will discuss ..
-
customize your build through release profiles.
-
publish libraries on https://crates.io/.
-
Organize large projects with workspaces.
-
Install binaries from https://crates.io/.
-
Extend Cargo using custom commands.
-
full explanation of all its features. https://doc.rust-lang.org/cargo/.
Customizing Builds with Release Profiles.
Cargo.toml

[profile.dev]
opt-level = 0

[profile.release]
opt-level = 3
-
cargo build command is useally for development.
-
cargo build --release is for the release.
-
we can controll opt-level setting. ( 0 to 3 ).
- default opt-level is zero, faster compiling than upper number.
Publishing a Crate to Crates.io
-
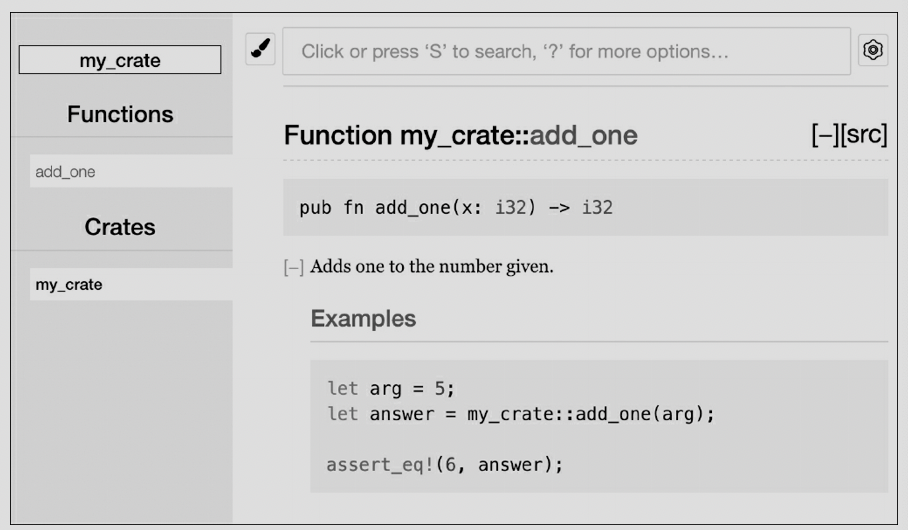
Making Useful Documentation Comments.
- documentaion comment - generate HTML documentation.
- example of documenting the source code.
- documenting use three slashes.
- description of what the add_one function does.
- start a section with the heading Examples
- demonstrates how to use the add_one function.
- we can generate by running cargo doc > target/doc directory
- more convenience, running cargo doc --open
/// Adds one to the number given.
///
/// # Examples
///
/// ```
/// let arg = 5;
/// let answer = my_crate::add_one(arg);
///
/// assert_eq!(6, answer);
/// ```

pub fn add_one(x: i32) -> i32 {
    x + 1
}
Commonly Used Sections
Panics , Errors, Safety
Documentation Comments as Tests
- adding example code blocks to your documentation comments can help demonstrate how to use your library, and doing so has an additional bonus: running cargo test will run the code examples in your documentation as tests.
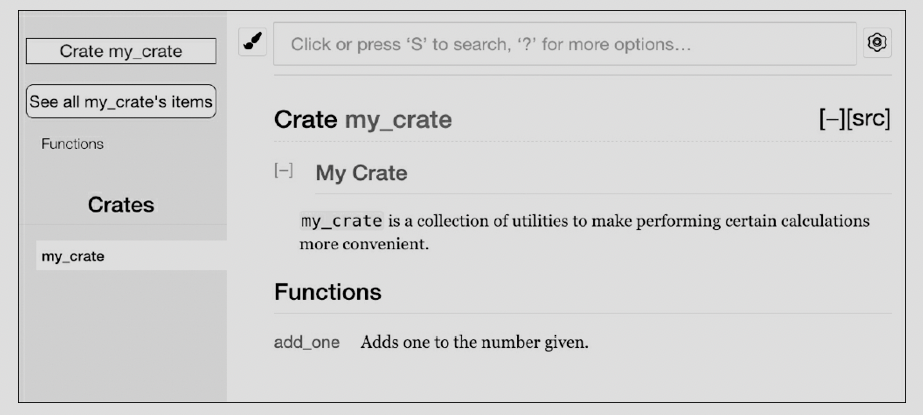
Commenting Contained Items
- Another style of doc comment, //!, adds documentation to the item that contains the comments rather than adding documentation to the items following the comments. We typically use these doc comments inside the crate root file (src/lib.rs by convention) or inside a module to document the crate or the module as a whole.
//! # My Crate
//!
//! `my_crate` is a collection of utilities to make performing certain
//! calculations more convenient.
 /// Adds one to the number given.
// --snip--
Exporting a Convenient Public API with pub use
-
you might want to organize your structs in a hierarchy containing multiple levels.
- people could have trouble finding out.
-
the structure of your public API is a major consideration when publishing a crate.
-
structure isn't convenient for others to use from another library, you don't have to rearrange your internal organization: instead, you can re-export items to make a public structure that's different from your private structure by using pub use.
//! # Art
//!
//! A library for modeling artistic concepts.
 pub mod kinds {

    /// The primary colors according to the RYB color model.
    pub enum PrimaryColor {
        Red,
        Yellow,
        Blue,
    }

    /// The secondary colors according to the RYB color model.
    pub enum SecondaryColor {
        Orange,
        Green,
        Purple,
    }
}


pub mod utils {
    use crate::kinds::*;
    /// Combines two primary colors in equal amounts to create
    /// a secondary color.
    pub fn mix(c1: PrimaryColor, c2: PrimaryColor) -> SecondaryColor {
        // --snip--
    }
}
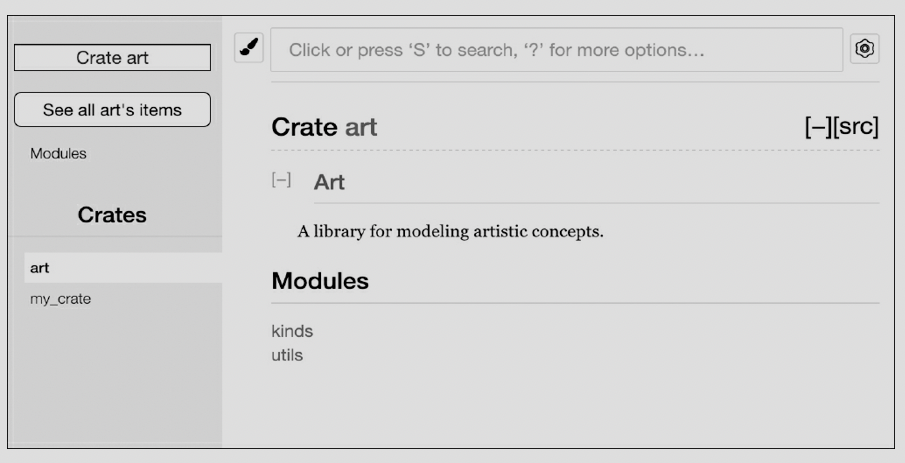
-
Note that the PrimaryColor and SecondaryColor types aren't listed on the front page, nor is the mix function.
-
we have to click kinds and utils to see them.
use art::kinds::PrimaryColor;
use art::utils::mix;
 fn main() {
    let red = PrimaryColor::Red;
    let yellow = PrimaryColor::Yellow;
    mix(red, yellow);
}
-
we need to use statements that bring the items from art into scope.
-
this structure is more relevant to developers working on the art crate than to developers using the art crate.
-
developers have to figure out where to look, and the structure is inconvenient because developers must specify the module names in the use statements.
-
To remove the internal organization from the public API, we can modify the art crate code to add pub use statements to re-export the items at the top level.
//! # Art
//!
//! A library for modeling artistic concepts.

pub use self::kinds::PrimaryColor;
pub use self::kinds::SecondaryColor;
pub use self::utils::mix;

pub mod kinds {
    // --snip--
}

pub mod utils {
    // --snip--
}
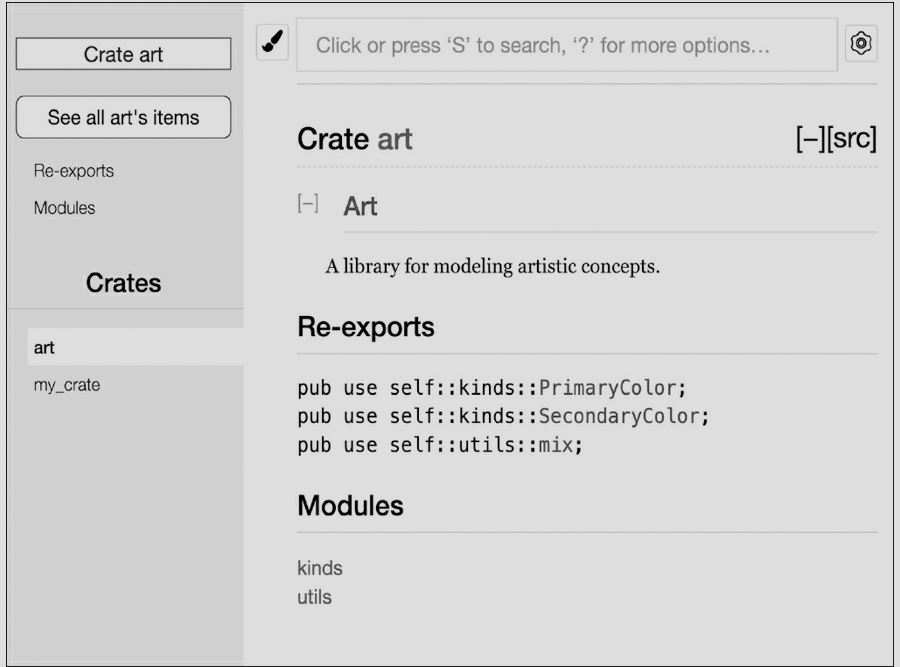
- now the art crate users can still see and use the internal structrue.
Setting Up a Crates.io Account
- before you publish any crates, you need to crate an account on https://crates.io and get an API token.
cargo login abcdefgadsf123 // api key from crates.io
- this command will inform Cargo of your API token and stroe it locally in ~/.cargo/credentials.
Adding Metadata to a New Crate
-
adding it to the [package] section of the crate's Cargo.toml file.
-
your crate will need a unique name. (you need to search it before publish)
- once a crate name is taken, no one else can pblish a crate with that name.
-
license http://spdx.org/licenses/, you need to check and adding it.
- also you can adding a license file.
Cargo.toml

[package]

name = "guessing_game"

version = "0.1.0"

authors = ["Your Name <you@example.com>"]

description = "A fun game where you guess what number the computer has
chosen."

license = "MIT OR Apache-2.0"

edition = "2018"

[dependencies]
Publishing to Crates.io
-
publish is permanent.
-
cargo publish command will upload your crates.
Publishing a New Version of an Existing Crate
-
when you have been made changes to your crate and are ready to release a new version, you change the version value specified in your Cargo.toml file and republish.
-
Use the Semantic Versioning rules at http://semver.org/.
Removing Versions from Crates.io with cargo yank
-
you can not remove previous versions of a crate, you can prevent any future projects from adding them s a new dependency.
-
In such situations, Cargo supports yanking a crate version.
cargo yank --vers 1.0.1

cargo yank --vers 1.0.1 --undo
Cargo Workspaces
- Cargo offers a feature called workspaces that can help manage multiple related packages that are developed in tandem.
Creating a Workspace
- we will have a workspace containing a binary and two libraries
mkdir add

cd add

vi Cargo.toml

//in Cargo.toml

[workspace]

members = [

	"adder",
]
$ cargo new adder

// then cargo build, inside or outside of adder.
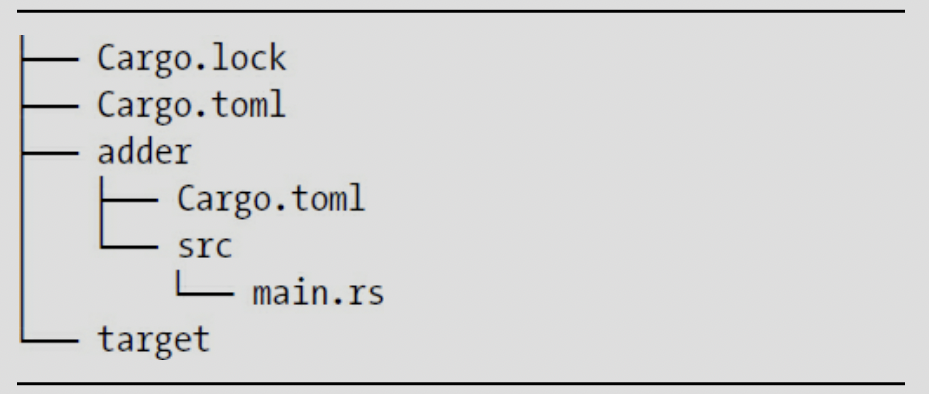
-
the workspace has one target directory at the top level for the compiled artifacts.
-
adder crate does not have its own target directory, Even if we were to run cargo build from insdie the adder directory. it would endup add/target.
-
the crates in a workspace are meant to depend on each other.
-
if each crate had its own target directory, each crate would have to recompile each of the other crates in the workspace to have the artifacts in its own target directory.
-
by sharing one target directory the crates can avoid unnecessary rebuilding.
-
Creating the Second Crate in the Workspace
- add top-level Cargo.toml on the members list - "add-one"
members = [

	"adder",
	"add-one",
]
$ cargo new add-one --lib
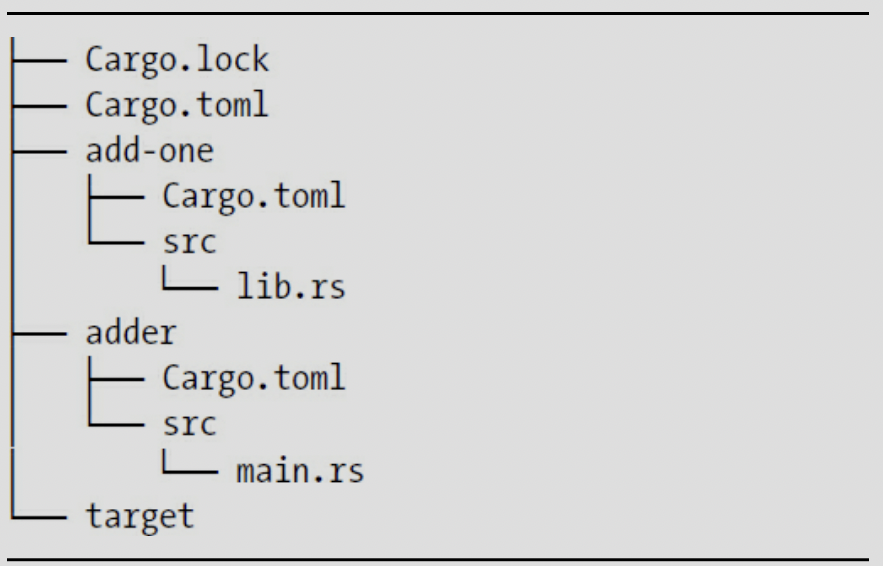
-
in the add-one/src/lib.rs
-
add add_one function that gets one parameter then add 1.
// in the adder/Cargo.toml

[dependencies]

add-one = { path = "../add-one"}
//adder/src/main.rs

use add_one;

fn main() {

	let num = 10;

	println!("Hello, world! {} plus one is {}!", num, add_one::add_one(num));

}
- cargo build in the top-level add directory
// -p ( package adder )
$ cargo run -p adder
Depending on an External Crate in a Workspace
-
Notice that the workspace has only one Cargo.lock file at the top level of the workspace rather than having a Cargo.lock in each crate's directory.
- this ensures that all crates are using the same version of all dependencies.
-
if we add rand crate to the adder/Cargo.toml and add-one/Cargo.toml files, Cargo will resolve both of those to one version of rand and record that in the one Cargo.lock.
-
we can not use it in other crates in the workspace unless we add rand to their Cargo.toml files.
- we do not need download it again.
Adding a Test to a Workspace
//add-one/src/lib.rs
pub fn add_one(x: i32) -> i32 {
    x + 1
}

#[cfg(test)]
mod tests {
    use super::*;

 #[test]
    fn it_works() {
        assert_eq!(3, add_one(2));

	}
}
-
cargo test in the top-level add directory.
-
we can test by using the -p flag for the crate that we want to test.
publish tip
-
you can not publish **cargo publish --all.
-
you should publish on each directory of Cargo.
Installing Binaries from Crates.io with cargo install
-
the ** cargo install ** command allows you to install and you binary crates locally.
-
note that you can only install packages that have binary targets.
-
A binary target is the runnable program otherwise library is not.
-
README file has infomation about a crate.
-
installed binaries stored in the installation root's bin folder.
-
if you installed Rust using rustup and do not have any custom configurations, this directory will be $HOME/.cargo/bin.
- ensure that directory is in your $PATH to be able to run programs you have installed with cargo install.
example)
$ cargo install ripgrep

Updating registry `https://github.com/rust-lang/crates.io-index`
 Downloading ripgrep v0.3.2
 --snip--
   Compiling ripgrep v0.3.2
    Finished release [optimized + debuginfo] target(s) in 97.91 secs
Installing ~/.cargo/bin/rg
you can use rg --help
Summary
-
customizing builds with profile.
-
publishing a crate to crates.io.
- documentation comment - ///
- generate by running cargo doc
- more convenience, running cargo doc --open
- commenting contained items //!
-
exporting a public API with pub use.
-
setting up a crates.io account.
-
adding metadata in cargo.toml.
-
publishing a new version of an existing crate.
-
removing versions from crates.io with cargo yank.
-
creating a workspace.
- creating the second crate in the workspace.
- members = ["a", "b", ..] in carglo.toml
- creating the second crate in the workspace.
-
adding a test to a workspace. ex) using -p flag